We accept wholesale customized service,feel free to contect with us:whatsapp:+8613392817215
"From Dough to Delicious: Your Ultimate Guide to Homemade Dumplings!"
Dumplings are not just food; they’re an experience! Discover creative ways to involve your family in the cooking process, making it a fun activity for kids and adults alike.
Annie
10/9/20245 min read
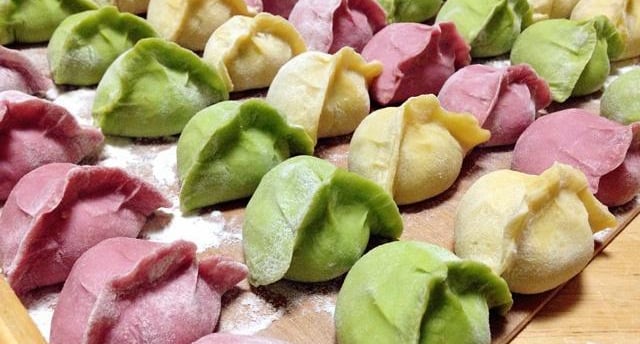
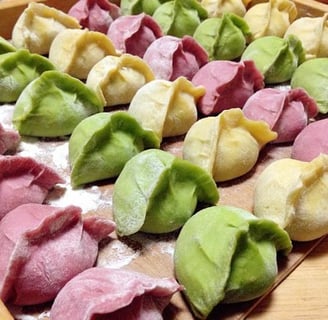
Dumplings are not just food; they’re an experience! Discover creative ways to involve your family in the cooking process, making it a fun activity for kids and adults alike.Over time, making dumplings became more than just a meal; it was a ritual that strengthened their family bonds. Every weekend, we would gather in the kitchen to create new recipes or revisit old favorites. We even invited friends over for dumpling-making parties, turning it into a community event filled with joy and laughter.The act of cooking together fostered communication and understanding within the family. Mei started sharing her dreams of becoming a chef, while Jian opened up about his struggles at school. The kitchen became a safe space where they could express themselves freely
How to Make Perfect Dumpling Wrappers?
Dumplings are a traditional Chinese delicacy, and the key to delicious dumplings lies in making a good dumpling wrapper. Below, we will provide a detailed guide on how to make soft and chewy dumpling wrappers, enhancing the flavor and texture of your dumplings.
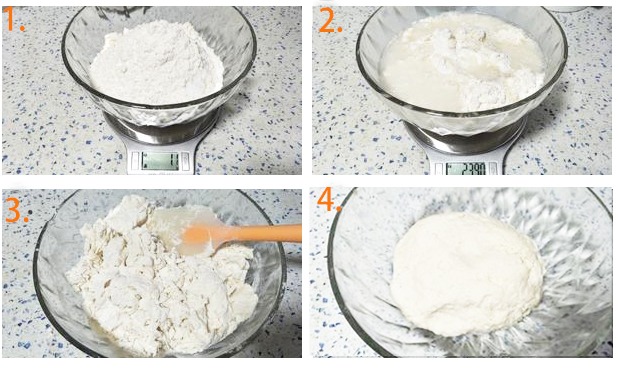
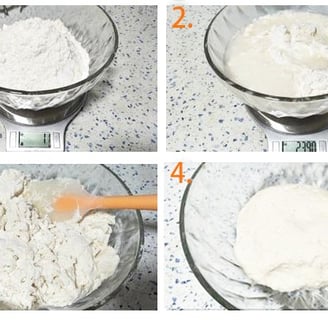
1.500g flour, add 1.1g salt to the flour and mix well with a spatula to form a floury mixture as shown in the picture. Add 240g of warm water, the temperature of the water should not be hot.
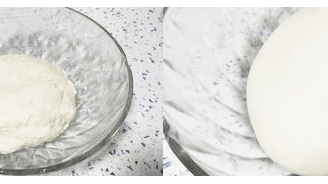
2.Wash your hands, dry them and knead the flour into a ball. As long as the water on your hands is wiped dry, you certainly won't have sticky hands while kneading. You don't need to knead vigorously for a long time, just knead it into a ball. It only took me 1 minute and a half to knead the dough as shown in the picture. The dough is medium-firm and feels soft like an earlobe when you touch it. If it sticks to your hands then you added too much water, you can add flour and knead it to a non-sticky dough.
3.Knead the dough and cover with plastic wrap and let it rest for 20 minutes. After 20 minutes of resting, knead the dough again with clean and waterless hands, I only kneaded it ten times to get a glossy surface as shown in the picture, this time it's a glossy surface, a glossy basin and a glossy hand. Isn't it a pleasant surprise? It's very labor-saving? Knead the dough again in the bowl, cover with plastic wrap and let it rest for more than 1 hour before you can use it.
Note:
after kneading the light surface you can continue to knead a little bit, If you have the strength, you can knead a little bit more, even if it's not so light, it doesn't matter, it won't affect the use of the dough later.
you must wake up for more than 1 hour after kneading the light dough, or you will find that the dough doesn't obey when you roll out .
I'd go to make the filling during this period of time, so I don't have to waste time to make my own Dumpling Wrappers.
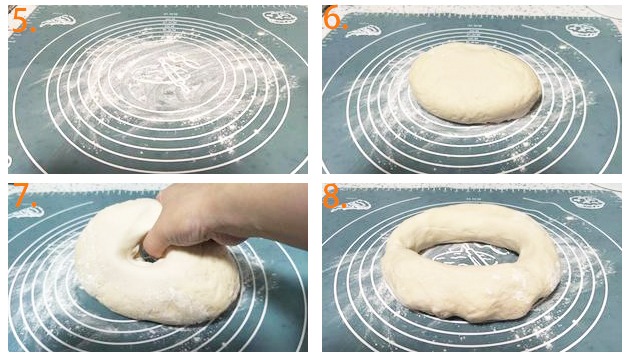
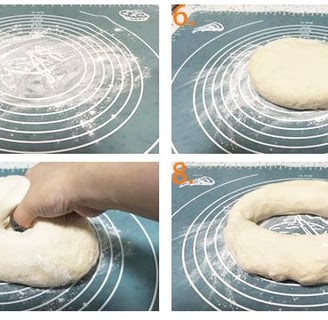
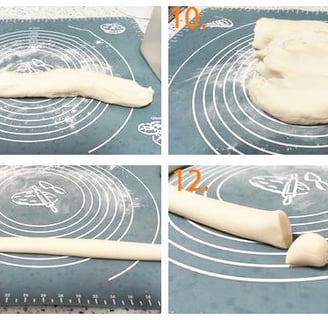
4. Once the dough has risen, prepare a clean mat like this and take the risen dough out and place it on the mat. Hold the dough steady with your left hand and poke a small hole in the center of the dough with your right thumb as shown in the picture. I had to take a picture, so I could barely make it like this. Then pick up the dough with both hands and turn it in a circle, spreading it out to get a circle like the one in the picture. The dough is very obedient, you don't need to knead it or anything, so you can experience how much less effort an obedient dough is! Pull it apart with your hands to get the big long strip of dough in the picture. Divide it into four sections with your hands. Do not knead the dough! Remove one of the sections and roll it with your hands into thin strips as in the picture. The noodles should be about the thickness of your thumb. At this point, quickly return the remaining dough to the bowl and wrap it in plastic wrap to moisturize it and prevent the surface from drying out.
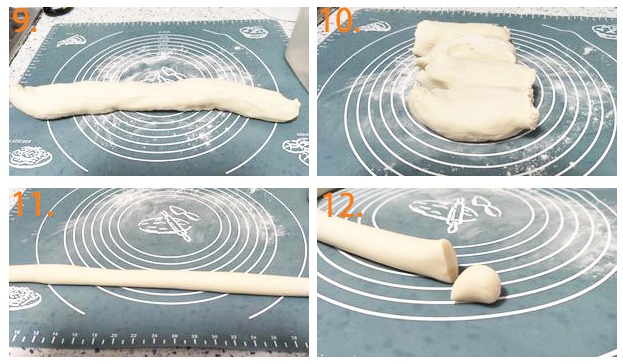
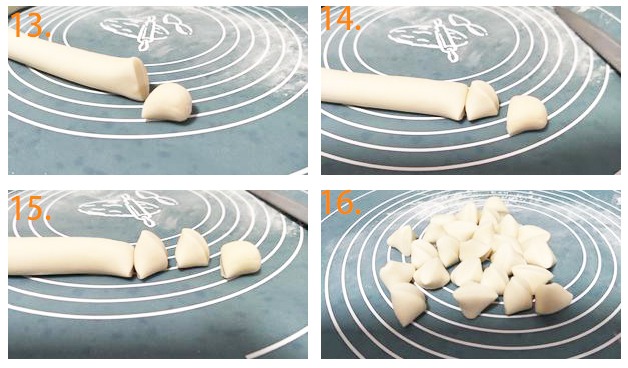
5.The next step is to cut the dough. Use a knife to cut out dough the size you see in the picture. I usually get about 7-9 grams a piece. Turn the dough 90 degrees to stand up, like in the picture. Make a second cut to get the second dough in the picture. Turn the dough 90 degrees again to stand up, or you can turn it 90 degrees upside down, like in the picture. The third cut will give you the third dough in the picture. Try to make them the same size in order to make the skin about the same size and thickness when you roll it out at the end. Take your time, there's no rush. Grab a handful of flour and sprinkle it on the small dough balls, rub your hands back and forth to make each small dough ball evenly coated with flour.
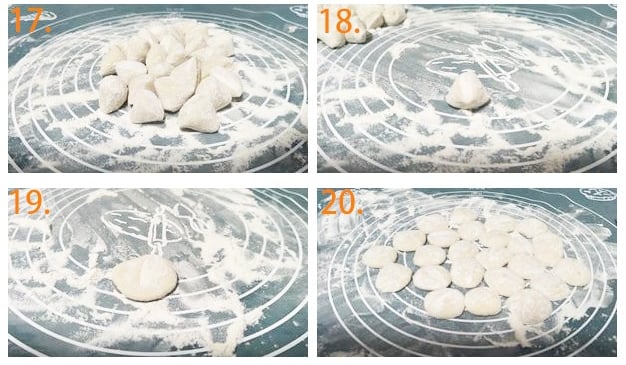
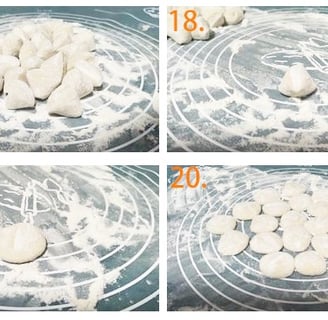
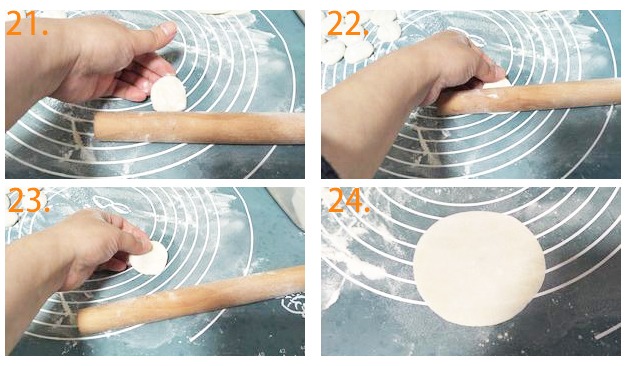
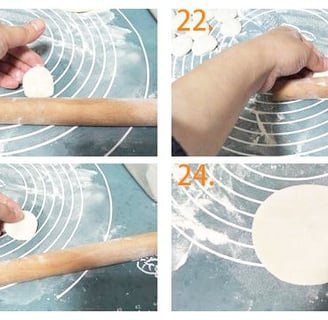
6.Take a small piece of dough and press it down along the knife edge with the palm of your hand to flatten the dough as shown in the picture. The pressed dough is shown in the picture. Now it's time to roll out the dough. Take out a pressed dough and prepare a rolling pin.(If you can't control the thickness of the dough, opt for this rolling pin that adjusts the thickness.)
7.Take the dough in your left hand and the rolling pin in your right. The position of the dough and rolling pin is as shown in the picture. The picture of how to hold the dough in the left hand can also be seen clearly. While the left hand is holding the dough steady, the right hand pushes the rolling pin firmly into the dough and presses it. Once pressed, the right hand brings the rolling pin back, at which point the left hand turns the dough counterclockwise at an angle of about 30 degrees. Then hold the dough steady with your left hand and push the rolling pin into the dough with your right hand to press. Repeat this and you will have the dumpling skin as shown in the picture. I usually repeat this 20 times to complete one sheet.You can also roll two together, sometimes I roll three or even four together. Much more efficient!


Contact us
Email:szchuangqi@gmail.com
Phone:13392817215
Whatsapp:13392817215
Adress:5/F,Xingxiang Building,No5057 Songbai Road,Matian Community,Guangming District,Shenzhen,China.
Earning Disclaimer
My site participates in various affiliate marketing programs,which means that by making purchases through our links to retailer'websites,we get a commission!