We accept wholesale customized service,feel free to contect with us:whatsapp:+8613392817215
Handmade Puff Pastry
Puff pastry is a versatile and flaky pastry that can elevate both sweet and savory dishes.
Annie
9/5/20244 min read
Handmade Puff Pastry (Rough Puff Method)
Puff pastry is a versatile and flaky pastry that can elevate both sweet and savory dishes. While traditional puff pastry can be time-consuming and requires precision, the rough puff method simplifies the process without sacrificing the delightful layers that make puff pastry so special. Here, we’ll explore how to make handmade puff pastry using the rough puff method, perfect for tarts, pastries, and more!
What is Rough Puff Pastry?
Rough puff pastry is a quicker and easier version of classic puff pastry. Instead of incorporating butter into the flour through multiple folds and turns, the rough puff method involves mixing the butter into the flour in larger chunks. This technique creates distinct layers of butter and dough, resulting in a light and flaky pastry that’s perfect for various recipes.
Ingredients:
To make rough puff pastry, you will need:
2 cups (250g) all-purpose flour
1 teaspoon salt
1 cup (225g) unsalted butter, cold and cut into small cubes
½ cup (120ml) cold water
Equipment
Mixing bowl
Rolling pin
Plastic wrap
Baking sheet
Parchment paper
Why do the butter and water have to be cold? It’s important for the butter to stay cold so it doesn’t melt and soak up all the flour. We want the butter to stay solidified as we roll, shape, fold, and flatten this dough because if it melts before baking, you lose all the flakes. Game over. You see, when the butter melts in the oven, it creates steam and that steam separates the dough into multiple flaky layers. Cold butter is what makes cheddar biscuits and scones flakey too!
Step-by-Step Instructions:
1. Prepare the Dough
In a large mixing bowl, combine the flour and salt. Add the cold, cubed butter to the flour mixture. Using a pastry cutter or your fingertips, gently mix the butter into the flour until the mixture resembles coarse crumbs with some larger chunks of butter remaining. This step is crucial for creating the flaky layers.Can I use a food processor, pastry cutter, or other mixer? I do not recommend it. These tools slice down the butter too much and you’ll lose a lot of flaky layers. I tried and it’s not worth it because the result is closer to a greasy pie dough than a layered puff pastry. (Still good, but not the goal here.)
2. Add Water
Make a well in the center of the flour and butter mixture. Gradually pour in the cold water, mixing gently with a fork until the dough begins to come together. Be careful not to overwork the dough; it’s okay if there are still some visible pieces of butter.
3. Form the Dough
Turn the dough out onto a lightly floured surface and gently knead it a few times to bring it together. Shape the dough into a rectangle, about 1 inch thick. Wrap it in plastic wrap and Refrigerate dough for at least 2 hours and up to 24 hours. This resting time allows the gluten to relax and the butter to firm up.
4. Roll and Fold
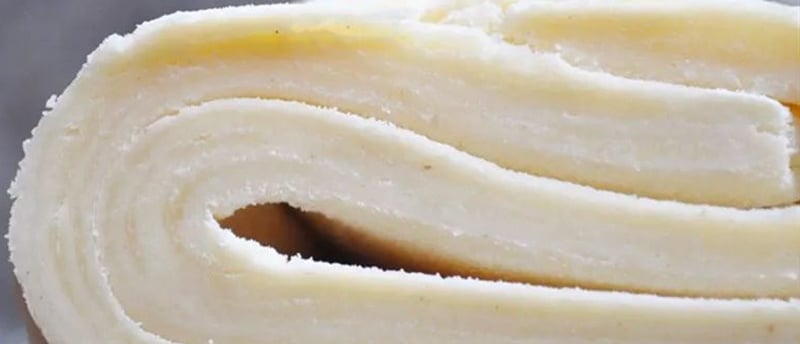
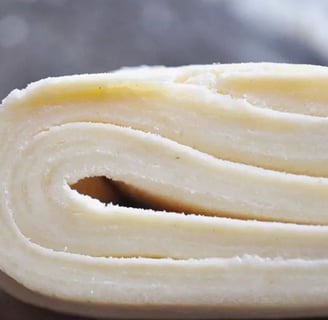
Take the dough out of the refrigerator to begin the “rolling and folding” process. If the dough chilled for longer than about 3 hours, it’s likely very stiff so let it rest for about 5 minutes before you begin rolling. Lightly flour a work surface. The dough gets sticky, so make sure you have more flour nearby as you roll and fold. Use your hands to gently flatten the dough into a small square. Using a rolling pin, roll the dough into a 6 inch wide and 12 inch tall rectangle that’s 1/2 inch thick. The exact dimensions are not important, but the thickness is. As you roll, it’s best to flip the dough over once or twice to make sure it’s not sticking to your work surface. Lightly flour your work surface as needed. Fold the rectangle into thirds as if it were a business letter. (See photos and video tutorial.) Turn it clockwise or counter clockwise and roll it out into a 6×12 inch 1/2 inch thick rectangle again. Then, fold into thirds again. Turn it clockwise or counter clockwise. You’ll repeat rolling and folding 4 more times for a total of 6 times.
5. 2nd Refrigeration: Wrap up/seal tightly and refrigerate for at least 15 minutes and up to 24 hours before using in your recipe.
6. Final Roll
After the second chill, your rough puff pastry is ready to be rolled out for use. Roll it out to your desired thickness, typically about 1/8 inch for most recipes. You can now use it for tarts, turnovers, or any dish that calls for puff pastry.
Tips for Success
Keep Everything Cold: The key to successful puff pastry is keeping the butter and dough cold. If the butter starts to melt, the layers will not form properly.
Don’t Overwork the Dough: Handle the dough as little as possible to avoid developing too much gluten, which can make the pastry tough.
Experiment with Flavors: You can add herbs or spices to the flour for savory pastries or incorporate a touch of sugar for sweet applications.
Using Your Puff Pastry
Once you’ve made your rough puff pastry, the possibilities are endless! Use it to create:
Savory Pies: Fill with vegetables, cheese, or meats for a delicious meal.
Sweet Tarts: Top with fruits and custards for a delightful apple pie dessert.
Turnovers: Stuff with your favorite fillings for a quick snack or breakfast.
Conclusion
Making handmade puff pastry using the rough puff method is a rewarding experience that opens up a world of culinary possibilities. With just a few simple ingredients and techniques, you can create a flaky, buttery pastry that will impress your family and friends. So roll up your sleeves and get ready to enjoy the delicious results of your labor—your homemade puff pastry awaits!
Contact us
Email:szchuangqi@gmail.com
Phone:13392817215
Whatsapp:13392817215
Adress:5/F,Xingxiang Building,No5057 Songbai Road,Matian Community,Guangming District,Shenzhen,China.
Earning Disclaimer
My site participates in various affiliate marketing programs,which means that by making purchases through our links to retailer'websites,we get a commission!